Connecting to the DataClarity PostgreSQL DB
1. Create a Kubernetes service to allow external connection to the DB:
a. Access the Kubernetes dashboard, and click the Create button (in the upper-right corner).
b. In the textbox from the Create From Text Input tab, paste the following content:
apiVersion: v1
kind: Service
metadata:
name: postgres-external
labels:
solution: dataclarity-platform
app: postgres
spec:
selector:
app: postgres
type: NodePort
ports:
- name: pg
protocol: TCP
port: 5432
nodePort: 31050
The external port that is used to connect to the PostgreSQL database, in this case, is 31050. You can set any open port in the following range: 30000-32767.
2. If the firewall is active on the machine where the DataClarity platform is installed, open the port for the external postgres service, created in step 1.
Ubuntu example
sudo ufw allow 31050
Red Hat example
sudo firewall-cmd --zone=public --add-port=31050/tcp –permanent
3. (Optional) Create a superuser account for various actions, including backups.
3.1. Connect to the VM via a SSH terminal (like putty), and connect to the PostgreSQL docker container:
kubectl exec -it postgres-67fc4f87f8-vwvsf sh
Note: The postgres container has a different name in each case, but it always starts with postgres. While entering the command, press the Tab key after typing ‘post’ to autocomplete the container name.
3.2. Connect to the PostgreSQL server:
psql -U postgres
3.3. Create the super user account:
CREATE ROLE admin SUPERUSER LOGIN PASSWORD 'password';
3.4. Close the PostgreSQL connection:
\q
3.5. Exit the postgres container:
exit
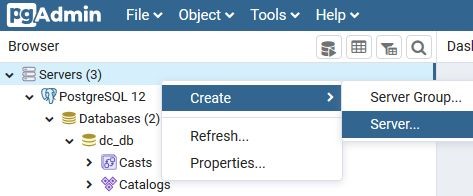
4. Open pgAdmin and create a server connection by right-clicking Server and selecting Create > Server.
4.1. On the General tab, enter a name for the connection.
4.2. On the Connection tab, add the hostname, port, username, and password and click Save.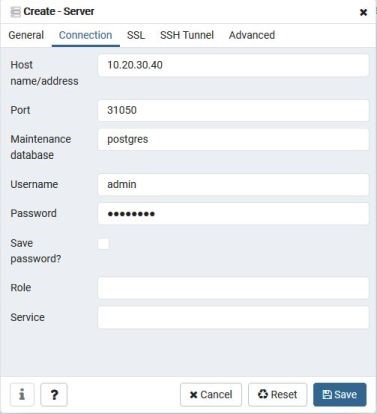
4.3. Expand the connection name > Databases > the database name > Schemas > public > Tables to see all the tables from the selected database.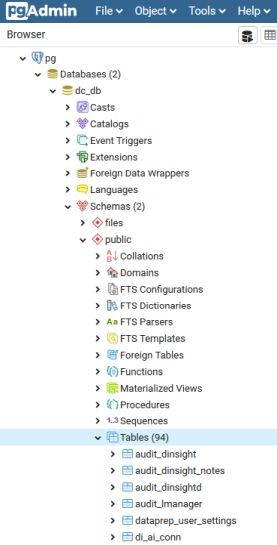
4.4. To query a table, right-click one and select View/Edit Data > All Rows.
4.5. You can open the Query Tool to execute any SQL statements by right-clicking any object from the left panel and selecting the Query Tool; you can also find it in the Tool menu.
4.6. (Optional) To enable auto-commit in the Query Tool, click the Execute Options button (right next to the Execute button), and select Auto commit (though it’s best not to leave it enabled).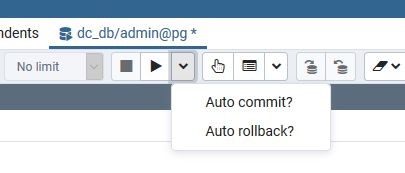
4.7. To disconnect from the Postgres server, right-click the server and select Disconnect Server.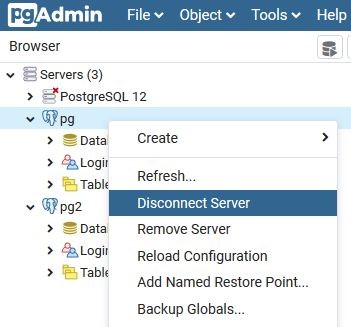
Comments
0 comments