Edit page properties
For each page on a storyboard, you can change its name, color, background image, layout type and size, the appearance of page tabs, and the order of the widgets.
Prerequisites
You have all the necessary role permissions granted by an administrator in Access Manager.
 Permissions
storyboards.access
storyboards.storyboard.create
You opened a storyboard and selected the page whose properties you want to edit.
For the content in Shared with me, you need to have the View and Edit shared content permissions granted by the sharer.
Procedure
On the Storyboards toolbar, click
 Enable changes.
Point to a page tab, click
 Options, and then click Customize.
The Pages pane appears.
Edit the following page properties as needed:
 Page tabs
To customize the page navigation bar and the page tabs’ appearance, in the Appearance section, next to the page name, click
 Customize page tabs. For details, see Page tabs pane.
 Background
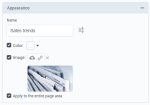
As a page background, you can use color, an image, or both. If both are set, the color is placed on top of the image layer.
In the Appearance section, define the following settings as needed:
Color – Set a color. For details, see Color picker.
Image – Upload an image or provide its URL link. Supported image formats are GIF, PNG, and JPG.
Apply to the entire page – Select if you want to apply the image and/or color to the entire page area, including the page navigation bar. If you deselect this checkbox, the image and/or color is applied only to the layout area with cells.
 Layout size
In the Layout size section, select the type of layout size for the page:
Automatic – The page is automatically adjusted to the screen size of a browser. The widgets are automatically rendered to fit the screen without scrolling horizontally or vertically.
Fixed size – Select one of the predefined fixed layout sizes from the dropdown list—for example, desktop of a certain resolution, A3 landscape, A4 portrait, and so on. The widgets maintain their designed size and, if necessary, users can scroll vertically or horizontally to view the content.
Custom size – Fully customize the size by specifying width and height (in pixels or as a percentage of the page area).
 Layout
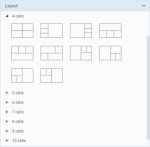
In the Layout section, click a layout to apply it to the selected page. Ensure that you scroll down to see all layout options. The layouts are grouped according to the number of cells (from 1 to 20).
Choose the appropriate page layout before adding widgets. A good rule is to have one cell for every widget that you want to add. However, you can select a different page layout or adjust it manually at any time. You can adjust the layout directly on the page by moving the grid lines.
 Layers
You can stack several widgets on a storyboard so that one appears on top of another.
In the Layers section, set the order of the widgets: click the name of a widget, and then drag it to its new layer level. For additional information on ordering widgets on a storyboard, see Arrange widgets on a storyboard.
Tip: When you point to the name of a widget, the widget appears framed in red on the storyboard. If the widget is hidden in the stack, the place of the widget appears framed in red.
You can give names to the widget layers: in the Layers section, double-click the name of a widget, change its name, then press Enter. This change does not affect the title of the widget.
For details on modifying the settings of a widget, see Manage widgets.
 Other
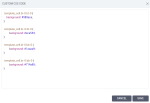
OtherTo customize the appearance of the page or the elements on the page with your custom CSS code, click
 Manage custom CSS code. For example, you can color each cell with a different color.
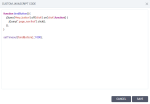
To add a code for some additional elements on the page, click
 Manage custom JavaScript code. For example, you can add a code for a button (widget) to navigate to a certain storyboard page.
Note: Use the developer tools in your browser to identify the page elements.
- (Optional) Point to a page tab, click
 Options, and then click Refresh to reflect the data changes in real time. However, the datasets are refreshed only if they are based on enterprise data sources.
 - Click
 Save on the Storyboards toolbar.


Comments
0 comments